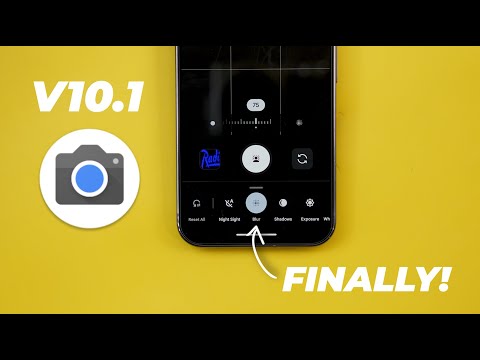
G Cam version 10.1 is here. I spotted two killer features, at least on the Pixel 10 Pro, and that's why I decided to create a dedicated video to show you all the new changes. So, without further ado, let's jump in. If you may know, the Pixel 10 Pro is the first Pixel phone to support realtime blur effect preview in portrait mode, which means you can immediately see the blur effect in the viewfinder even before snapping the shot. But what's new with version 10.1 is when you tap on this button at the bottom right corner, now you have the ability to adjust the blur effect intensity. And as you see here, I have the blur option with the floating slider on the screen that I can move all the way down to zero up to 100%.
And I have a reset button that always takes me to the default value, which is 75. And it's also highlighted on the slider with a dot. This feature is available on iPhones and Samsung phones for years, and I'm really happy to see it on Pixel phones because this feature will save you a lot of time. Instead of editing your photo in post in Google Photos to adjust the blur effect, now you can do it beforehand, which is a really nice touch. Unfortunately, this feature is not available on older Pixel models based on my testing. I installed G Cam version 10.1 on all the previous models I have and none of them got it. Not only this, but once you switch to the front camera, you will lose the functionality as well, even though you still can see the blur effect preview in the viewfinder, same as the back camera.
The second killer feature you get on the Pixel 10 Pro is the ability to take 50 megapixel photos using the ProRes zoom feature. Previously, once you activate the 50 megapixel mode, the ProRes zoom gets deactivated and your zoom level becomes limited to 30x. But now you can go all the way up to 100x with the 50 megap mode together. And I found the results to be so much better. So let me show you what happened. One of my biggest complaints about the new ProRes zoom feature of the Pixel 10 Pro in the past before version 10.1 was the too saturated and the unrealistic colors, but it seems like the new 50 megap mode that solved this problem. Now you see the 50 megapel version of this photo and the colors you see here match exactly the colors I see in real life. But once I switch to the 12 MP version, you can see how saturated it looks in comparison. It looks too blue while the 50 megap version is perfect.
And it's not just a one-time thing, but I kept trying multiple times getting the same exact results. Here's the 12 megapixel version, and here is the 50. It's a day and night difference. Here's another scene. This is the 12 megapixel version. It doesn't look great, but once I switch to 50, I'm getting the same exact colors I see in real life. I also found the details to be so much better. Getting back to the first example, here's the 50 megapixel version. When I zoom in on the text, doesn't look perfect, but you still can read the words.
It says, "Drive your dreams, the ultimate automotive destination." But when I switch to the 12 megapixel version, the word drive and the dreams are hardly readable. Same as the ultimate destination. You can barely see the text, while the 50 megapixel version is a lot better in comparison. Before jumping to the next chapter, let me tell you that this kind of videos take me a very long time and effort to make. things can easily get messy and confusing if I didn't plan and order my tasks the right way, which could lead to rework or missing something really important. I started to use a tool called AIFlow that saves me a lot of time and make things a lot easier to follow. First, I start by adding all the projects I need to work on. As expected, most of them are related to the newly released iPhone 17 Pro Max and the Pixel 10 Pro XL. This step alone free up my mind and they help me keep track of my progress.
Then I list all the tasks and link them to the relevant projects. As a pro tip, the hash sign allows me to link tasks to projects as I create them, which is a lot easier. On a side note, you can link up to 32 services like Gmail, Outlook, email, notion, Slack, and many more under the integrations page. So everything is in one place instead of jumping back and forth between tools. I personally use Gmail and Google calendar which I connected to AIFlow.
By this my calendar is on the right and the tasks I added earlier are on the left which will allow me to use the time blocking technique by dragging and dropping tasks to my calendar and assign a time block for each one. Additionally, when I mark related emails as important in my Gmail account, they automatically appear in my tasks inbox so I can also assign time blocks for them. Now I'm on top of everything and know exactly what I need to finish and when by just looking at one screen.
Another cool feature in AIFlow is the AI chat. You can use it to edit or reschedule your tasks and calendar events or automate certain actions like checking the weather or exchange rate and get notified when needed. All by just using natural language as if you're talking to chat GPT. If you want to try a flow right now, use the link in the description or the pinned comment. And now let's get back to the video. Back to G Cam. And starting this point, I will show you the differences between version 10 that comes pre-installed on the Pixel 10 models and version 10.1 that we have right now. And by the way, these features are also available on older Pixel models, but I don't have the full list of supported devices per feature. So you need to check your phone to make sure if you have it or not.
The first difference between version 10 and 10.1 is when you go to the settings page, it now supports dark theme and light theme. not only dark theme like before. The second change is under devices storage. Now we have a dedicated section called settings that will it change. When you expand it, it will show you the full list of features that will be deactivated once you turn on the storage saver switch. The feature works exactly the same as version 10, but now you can know exactly what features you will lose. And to show you how it works, when you turn on the toggle and try to activate any of these features, it will give you a pop-up to turn off the storage saver first to be able to use it.
The third difference between version 10 and 10.1 is sometimes the help button at the top right corner shows the current camera mode you are on to let you know that tapping on it will take you to the articles specific to this camera mode. Sometimes it happens, sometimes it doesn't. But I have to keep switching between camera modes for this animation to appear. As you see, it says here long exposure. And when I tap on it, it takes me to the long exposure help page. So, these are all the differences between version 10 and 10.1. But let me also show you the differences between version 9 and version 10 in case you are using a Pixel 9 or older. But first, if you like any of the wallpapers you see in this video, they are now available in the wallpapers by in-depth tech reviews app. Plus, you have the ability to download these wallpapers locally on device to apply the Android 16 live effects on them. And you will see here that I'm using this wallpaper with the cinematic effect, which makes it looks stunning. If you want to give it a try, you will find the Google Play Store download link in the description.
And now, let's get back to Gcam. In this sideby-side comparison, I will be using the Pixel 8 Pro and the 9 Pro XL because they are very close in the camera features. And on the left I have version 9.9 while on the right I have version 10.1. And now let's take a look at the new differences. Starting with the viewfinder in 10.1 you will see this new help button at the top right corner. Tapping on it will take you to a brand new camera guide that gives you a lot of information about each and every feature. It includes videos and the how-to steps. While previously if you want to access the help of any feature you need to tap on the gear button and then tap on the question mark next to the feature and then it will show you a floating card on the screen. We still have the same thing in 10.1 but instead of showing a floating card it takes you to the same new camera guide. The second change is in the zoom slider. First the numbers are now much bigger plus they animate differently.
So when you compare both you will see a different animation and when you drag your finger the zoom level is now written inside an oval container to make things easier to read. And when it comes to the buttons you will notice here that all of them lost the borders. Plus the gallery and the camera switcher are now square buttons instead of the circular design.
Also, when you tap and hold on the shutter key to record a quick video, you will see a totally different design for the counter and also the lock. It's a little bit far away than the previous one. And it has a fill color around it. And here is how it looks in different camera modes. For example, when I go to portraits, now we have an icon instead of a white circle. When you go to add me, you will see a new icon as well. Then we have the long exposure. It's pretty much the same but smaller but action pan got its own icon now instead of using the same one like before. And when you go to night side here's how it looks on both looks different. And then we have the panorama which also got its own icon and instead of using the plain shutter key. And when it comes to videos you will see different designs as well. Here is how it looks in the normal video mode.
In the cinematic blur, it got a new icon instead of a white circle. In action pan, we have an icon. And when you go to the slow motion, you will see the same thing. And also timelapse. And this is how it looks when you start recording on both. The camera modes carousel is also narrower in the newer version. We got a brand new settings icon. And when you expand both, you will see that the more settings button is now an ellipses at the top right corner to save space.
Bigger font for the header. The tabs are using a more rounded design and the unselected items are using a square shape and they turn into circles when you tap on them. While previously everything was circular. Under the camera controls, you will see a brand new icon for the reset all button. And all the sliders are now redesigned to match the new design I showed you in the zoom slider. Under the normal video mode, when you expand the settings on both, you'll notice that now we have a new tab called more. The options are exactly the same, but Google decided to move some of the options we used to have here under the more tab, which are the stabilization and speech enhancement. And when it comes to the camera settings, you will see a complete revamp and some new options. First, all the toggles are now much bigger and they are using the new material 3 design language with a tick inside the toggle that turns into an X when you turn it off.
Each item now sits in its own container. The font is bolder and bigger to make things easier to read. Plus, you can push the settings further down to make it easier to reach. And also, the categorization makes a lot more sense in the newer version. We no longer have the advanced page and all the items that used to be here are now located under the relevant categories. Some of the options also got renamed. For example, button shortcuts is now called volume key action. Plus, when you tap on both, the newer version gives you the options right away. While previously it required two steps, the save selfie as previewed toggle is now called keep selfies as seen. Plus, we got a brand new toggle called optimize FPS. The description says, "Automatically adjust from 60 to 30 FPS to optimize the recording experience when needed." Or, in other words, it will drop the frame rate to 30 when you record videos in low light to give you a higher quality.
And by the way, after installing 10.1 on the 8 Pro, I got the same exact talk. So, that's pretty much it for today. That's everything you need to know about G Cam version 10.1. Please let me know in the comments if I missed anything..